
Media
Retro Console
A retro game player for your own game files, with a library, controllers and save states.
- Category
- Media
- Requires
- macOS 13+
- Size
- 2.4 MB
- Price
- Free
Preview
About Retro Console
Retro Console plays classic games from your own game files. You drag in files or whole folders, the app sorts them by system into a library, and a clean play window gives you controller support, save states and a scanline filter.
What it does
- Library. Drop in game files or pick a folder to watch. Grid and list views, search, favorites and recent games. Your games stay where they are, and the app never copies or uploads them.
- Emulator cores. Retro Console downloads the free libretro cores (Snes9x, Genesis Plus GX, mGBA and Beetle PSX) when you press Download in Settings, or automatically the first time a game needs one. It signs each core on your Mac before using it.
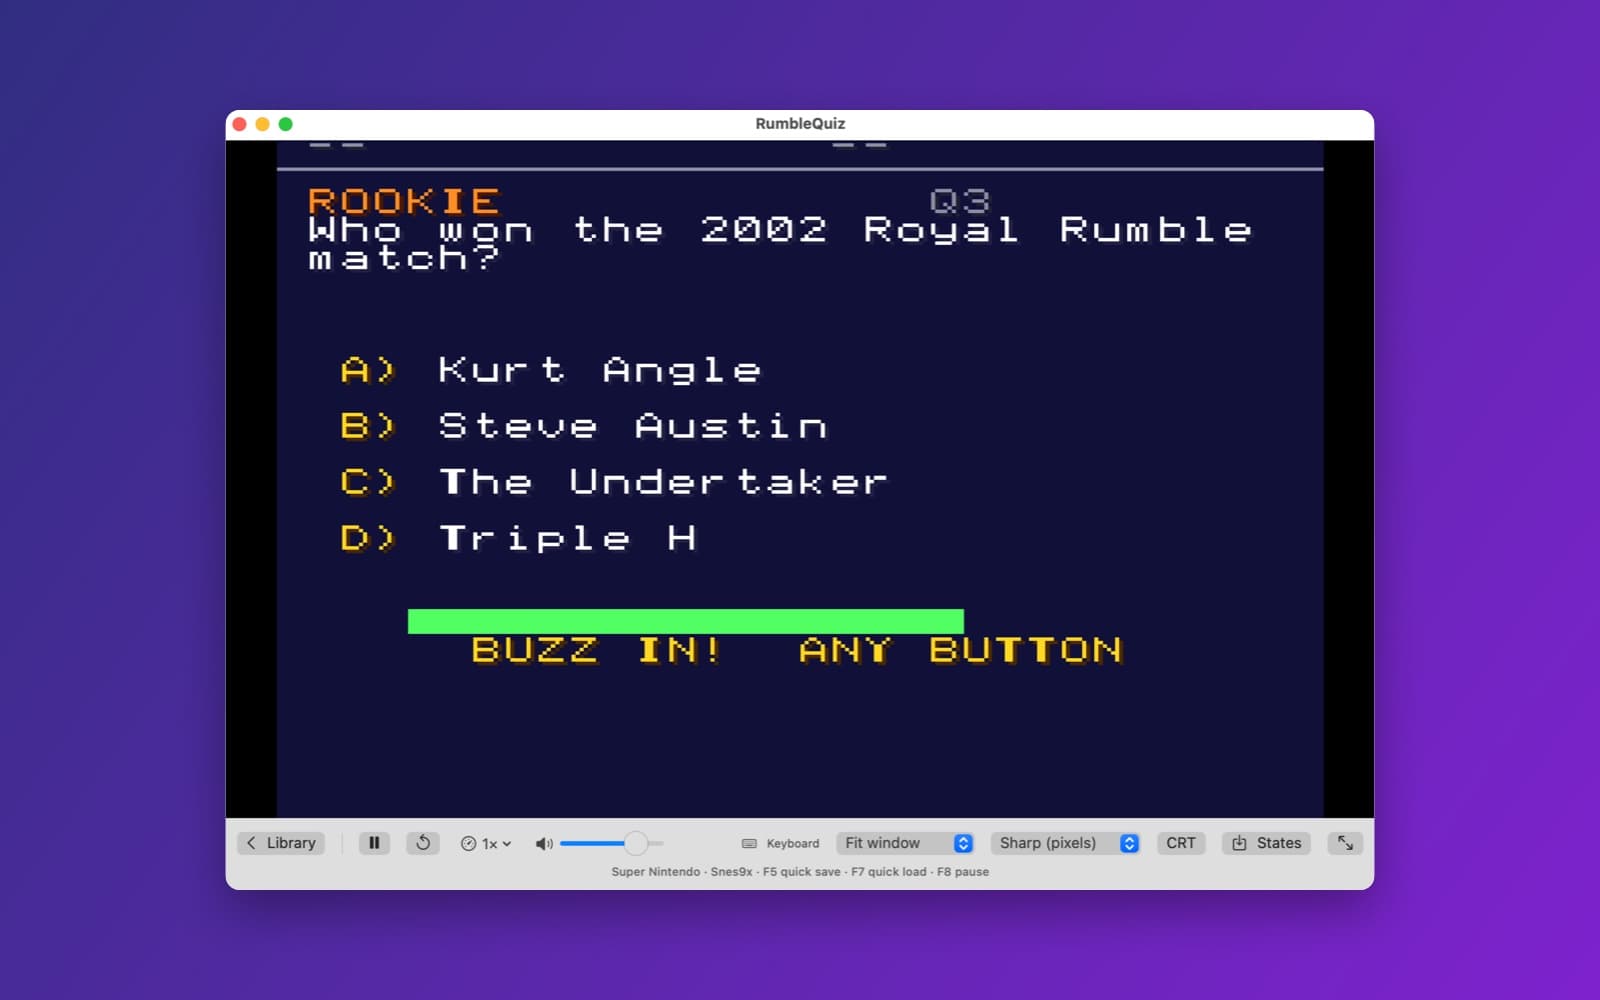
- Play window. Fit or whole-number scaling, a sharp or smooth picture, an optional CRT scanline effect, full screen, pause, reset, speed and volume.
- Controllers and saves. Game controllers work with a mapping screen for each system and the keyboard as a fallback. Four save-state slots per game with a screenshot, quick save and quick load keys, and normal in-game saves.
- Systems. SNES, Genesis, Master System, Game Gear, SG-1000, Sega CD, Game Boy, Game Boy Color, Game Boy Advance and PlayStation are recognized. Sega CD and PlayStation need a BIOS file that you choose yourself.
How it was made
One prompt in the SiliconDevKit desktop app, with the CODENAME project's link in it. The builder found that the project has no emulator source code in it, so it kept the project's core loader, video, audio and input code and made the app load the cores at runtime. Version 1.0 needed you to install cores by hand. One follow-up message made the Install Cores buttons work and added a Download button for each core and automatic downloads. That made 1.1. The prompt shown below is the first one, so on its own it makes the 1.0 version.
Notes
You need to own the games you play. Retro Console does not include or download games, BIOS files or box art. The emulator cores are separate projects with their own licenses, and the app downloads them from the official libretro build server. This app was built in the desktop app's unsafe mode, because the prompt names the CODENAME GitHub project, so it is not a template, and SiliconDevKit has not reviewed that code. CODENAME by Lonkins is licensed under the GPL-3.0, and this app is based on it. The full source code of this app is public under the same license: github.com/fp101fs/retro-console. We tested the app on a Mac with the Snes9x core and a free homebrew quiz game called RumbleQuiz, as in the screenshot. We did not test the other cores, Sega CD or PlayStation BIOS files, save states, controllers, or the audio on every system.
Information
- Developer
- SiliconDevKit (generated by AI from a prompt)
- Category
- Media
- Compatibility
- macOS 13 or later, Apple silicon. Apple silicon Macs only (M1 or later), not Intel
- Size
- 2.4 MB (.dmg)
- Latest version
- 1.1
- Price
- Free
- Signing
- Ad-hoc signed, not notarized
The prompt behind it
This app was generated from the prompt below. Paste it into SiliconDevKit to build your own version, then change it however you like.
Build a Mac app called Retro Console, a polished retro game player for the user's own game files, based on this open-source Swift and Metal project: https://github.com/Lonkins/CODENAME The goal is a working Mac app with a game library, controller support and save states. Keep the project's own emulator integration code and cores. Do not write an emulator yourself. RESEARCH FIRST (use WebSearch and WebFetch before you write code) Read the repo's README and license, and check which systems it plays (SNES, Genesis, Game Boy, GBA, others), how each core is built, and which of them are C or C++ code, Swift code or prebuilt binaries. Read each core's own license. Where the repo or this prompt disagree with what you find, follow what you find and say what changed. HOW TO PORT IT (read this first) - The repo is in Imported/. Read its README, its package or project files, and the folders for the app, the core bridge, the Metal renderer, input and audio. Ignore tests, screenshots and docs. - It must build with Swift Package Manager, with no Xcode project and no asset catalog (the code is compiled later on the user's Mac). Turn what the repo has into a Package.swift with Swift targets for the app and the bridge, and C or C++ targets for each core whose sources are in the repo. Keep the project's own structure and file names where you can. If a core cannot be built as a package target (it needs a build system, generated files or a download you cannot make), leave it out of the build, and tell the user in the app which systems are not available and in your reply why. - Target macOS 13, Swift 5 language mode if the code does not need Swift 6, and only APIs that exist on macOS 13. Run the emulation on its own thread, never on the main thread. - Keep every license: show an About window with the project's license, each core's name and license, and the line "You must own the games you play". List all the credits the repo asks for. THE APP (use the repo's pieces; write what is missing) - A library window: drag and drop game files or whole folders onto it, or pick a folder to watch. Group games by system, with a grid and a list view, search, and recent and favorites. Identify the system by file extension and, where the core needs it, by the header. Keep the library as JSON in Application Support. Never copy, upload or download games. Games stay where the user has them. - No game files, no BIOS, no firmware, no box art from the internet are bundled or downloaded. If a core needs a BIOS file, say which file it needs, let the user choose it, and keep working for the cores that do not. - Play window: the Metal view from the repo with an integer scaling choice, a smooth or sharp filter, and an optional CRT or scanline effect written in Metal (a small shader that is easy to turn off), full screen, Pause, Reset, a speed control and a volume slider. Sound through AVAudioEngine from the core's audio buffer. - Controllers: GameController framework (GCController), with automatic setup for common pads, a mapping screen per system, and keyboard keys as the fallback. Show which controller is connected. - Save states: 4 slots per game with a screenshot thumbnail, quick save and quick load keys, in-game battery saves written next to the game's data in Application Support, never beside the user's game file. Rewind only if the repo's cores support it. - Settings: library folders, controller mapping, video filter, a Reveal in Finder for the data folder, and "Clear library" with a confirmation. - Friendly errors: file not recognized, core missing, BIOS needed, and a crash in a core (show a message and return to the library, with the details in a box). QUALITY - Modular: Library, SystemCatalog, CoreBridge, Renderer, AudioOutput, InputMapper, SaveStates and the views. Do not fake anything: no sample games and no pretend systems. If something from the repo cannot be made to work, say exactly what was left out. - In your reply, say in a few sentences what you kept from the project, what you wrote new, which systems work, and what may not work, especially the cores that could not be built, the audio timing and controllers, because the code was written without being able to play a game.
What it cost
Every AI run that made this demo, one per line. Model: Claude Sonnet 5.5. Tokens are shown as (in / out). “In” counts everything the model read, including text it had already seen in the session at a reduced price.
| Initial prompt(4.85M in / 121k out) | 291 credits | |
| + | Follow-up 1(1.66M in / 13k out) | 55 credits |
| = | Total(6.51M in / 134k out) | 346 credits |
Credits are what a build uses on your plan. This counts AI usage only: hosting and the Mac that compiled it are not included. This demo took 2 attempts, and all of them are counted.
Opening it for the first time
- Open the .dmg and drag Retro Console onto the Applications folder.
- Open it from Applications. macOS may say it can’t check the app for malicious software. Click Done.
- Open System Settings → Privacy & Security and click Open Anyway. This is needed once. Why this happens. To share an app without the warning, see how to notarize it.
You might also like
 Get
GetPlayTube
Paste a video link and watch it in a clean player, with no ads.
 Get
GetAdMute
Listens to your Mac's audio and mutes the ads, then brings the sound back.
 Get
GetToob-Downer
Paste a video link and save the video to your Mac, with a queue to keep track.
 Get
GetAgent Swarm
Send one task to Claude, Gemini and Hermes at once.